How to Prepare Your Bird House for Spring? – A Comprehensive Guide to Attract and Accommodate Feathered Friends
As spring approaches, it’s time to prepare your bird house for the upcoming nesting season.
Creating a welcoming environment for our feathered friends not only supports local bird populations but also brings joy and life to your garden.
This comprehensive guide will walk you through the process of preparing a bird house for spring, from cleaning and maintenance to proper placement and attracting specific bird species.
Key Takeaways:
- Clean thoroughly: Remove old nests and sanitize the interior to prevent disease transmission.
- Inspect for damage: Check for cracks, loose parts, or signs of wear and repair as needed.
- Ensure proper drainage: Drill or clear existing drainage holes to prevent water accumulation.
- Improve ventilation: Add or clear ventilation holes to regulate temperature and humidity.
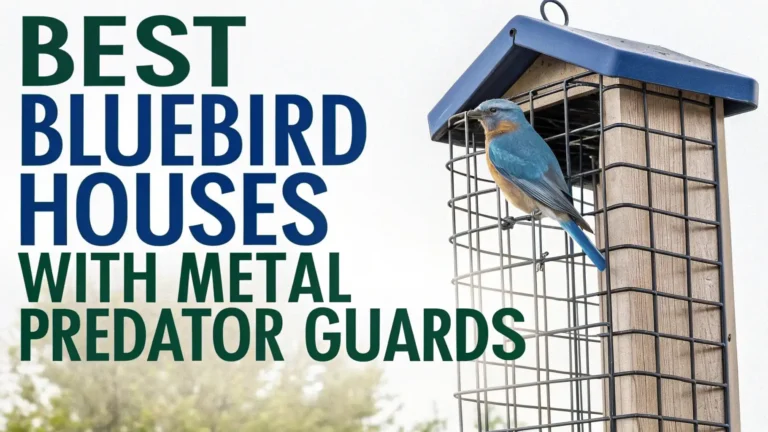
- Consider predator guards: Install baffles or other protective measures to deter predators.
- Choose the right location: Place the bird house at an appropriate height and away from direct sunlight.
- Time it right: Install or rehang bird houses in early spring before birds start searching for nesting sites.
- Avoid using perches: Most cavity-nesting birds don’t need perches and they can attract predators.
- Use appropriate materials: Opt for untreated wood or gourds for a natural and safe nesting environment.
- Customize for target species: Adjust entrance hole size and interior dimensions to attract specific bird species.
- Provide nesting materials: Offer twigs, grass, and other natural materials nearby for birds to use.
- Monitor regularly: Check the bird house periodically during the nesting season for any issues or maintenance needs.
Thorough Cleaning: The First Step in Bird House Preparation
The first and most crucial step in preparing your bird house for spring is a thorough cleaning. This process is essential to create a healthy environment for new nesting birds and prevent the spread of diseases or parasites from previous occupants.
Start by removing any old nesting material from the interior of the bird house. Use a putty knife or similar tool to scrape out debris, being careful not to damage the interior surfaces.
Once the bulk of the material is removed, use a stiff brush to sweep out any remaining particles. Next, prepare a cleaning solution using one part bleach to nine parts water.
Using this solution, thoroughly scrub the interior and exterior of the bird house, paying special attention to corners and crevices where parasites might hide.
Inspecting and Repairing: Ensuring Structural Integrity
After cleaning, the next step is to carefully inspect your bird house for any signs of damage or wear. Look for cracks in the wood, loose joints, or any areas where water might be able to seep in.
Pay special attention to the roof, as this is the primary defense against rain and other elements. If you find any issues, now is the time to address them.
For minor cracks or gaps, use a waterproof wood filler to seal them. For more significant damage, you may need to replace entire sections of the bird house.
Check that all screws or nails are tight and not rusting. If they are, replace them with new, corrosion-resistant fasteners. Inspect the entrance hole to ensure it hasn’t been enlarged by squirrels or other animals.
If it has, you may need to attach a metal plate around the hole to reinforce it.
Enhancing Drainage and Ventilation: Creating a Comfortable Nesting Environment
Proper drainage and ventilation are crucial for maintaining a healthy environment inside the bird house. To ensure adequate drainage, check that there are small holes in the bottom of the bird house.
If these don’t exist or are blocked, drill new ones using a 1/4 inch drill bit. These holes allow any water that might enter the house to drain out, preventing dampness that could harm eggs or chicks.
For ventilation, there should be small holes near the top of the bird house, just under the roof overhang. These allow hot air to escape, keeping the interior cool during warm days.
If your bird house doesn’t have these, carefully drill a few 1/4 inch holes on each side. Be cautious not to make the holes too large, as this could allow predators to reach inside.
In addition to these modifications, consider the overall design of your bird house. A slightly sloped roof with a good overhang will help keep rain out.
Predator Proofing: Protecting Nesting Birds from Threats
Ensuring the safety of nesting birds is a critical aspect of bird house preparation. Start by installing a predator guard or baffle on the pole or tree where your bird house is mounted.
This can be a simple cone-shaped device that prevents climbing predators like cats, raccoons, or snakes from reaching the nest.
If your bird house is mounted on a wooden post, consider wrapping the post with sheet metal to make it difficult for predators to climb.
Another important consideration is the entrance hole. Ensure it’s not too large, as this can allow predators or competing bird species to enter. If needed, you can install a metal plate around the entrance hole to prevent enlargement by squirrels or woodpeckers.
Avoid using perches near the entrance hole, as these can provide a foothold for predators. Instead, ensure the entrance hole is the right size for your target bird species – they don’t need a perch to enter.
Finally, consider the placement of your bird house. Mount it at a height that’s appropriate for your target species, but also high enough to be out of reach of ground predators.
Choosing the Right Location: Optimal Placement for Bird Houses
The location of your bird house can significantly impact its success in attracting nesting birds. When choosing a spot, consider both the needs of the birds and the ease of monitoring for you.
Most bird species prefer houses that face away from prevailing winds and direct afternoon sun. A location that faces east or southeast often works well, providing morning warmth without the intense heat of the afternoon.
The height at which you mount the bird house depends on the species you’re trying to attract.
For example, bluebirds prefer houses 4-6 feet off the ground, while purple martins like their houses 10-15 feet high.
Ensure there’s clear flight path to the entrance hole, free from branches or other obstructions. Some birds, like chickadees, prefer houses near or within wooded areas, while others, like bluebirds, prefer more open spaces.
If you’re placing multiple bird houses, space them appropriately to avoid territorial conflicts. Generally, it’s best to place houses for the same species at least 25-30 feet apart.
Timing is Everything: When to Install or Rehang Bird Houses
The timing of when you install or rehang your bird houses can significantly impact their occupancy. In general, it’s best to have your bird houses in place by early spring, before birds begin their search for nesting sites.
Depending on your location, this could be anywhere from late February to early April.
Some birds, like chickadees and titmice, start scouting for nesting sites as early as late winter, so having houses available early can increase your chances of attracting these species.
If you’re rehanging existing bird houses, aim to have them cleaned, repaired, and back in place by mid to late winter. This gives the houses time to weather and lose any human scents that might deter birds.
For migratory species that return in spring, such as bluebirds or tree swallows, having houses ready by the time they arrive is crucial.
Keep in mind that some birds, like house wrens and American robins, may have multiple broods in a season, so leaving houses up throughout spring and summer can provide opportunities for second or third nestings.
Avoiding Perches: Why They’re Unnecessary and Potentially Harmful
Contrary to popular belief, perches are not necessary for bird houses and can actually be detrimental to the safety of nesting birds.
Most cavity-nesting birds, which are the primary users of bird houses, are perfectly capable of landing directly on the edge of the entrance hole.
Species like bluebirds, chickadees, and wrens have strong feet and legs that allow them to cling to the front of the house while entering or exiting.
In fact, adding a perch can create more problems than it solves. Perches can provide easy access for predators like raccoons or cats, allowing them to reach into the nest more easily.
They can also give an advantage to invasive species like house sparrows, which may try to take over the nest box.
Additionally, perches can make it easier for cowbirds, which are nest parasites, to access the nest and lay their eggs. If your existing bird house has a perch, it’s best to remove it.
Use a pair of pliers to pull it out, and then fill the hole with wood putty or a small dowel. If the perch is an integral part of the house’s design, you can simply saw it off flush with the front of the house.
Choosing Appropriate Materials: Natural and Safe Options for Bird Houses
When it comes to bird houses, the materials you choose can significantly impact the health and comfort of nesting birds. Untreated wood is the best material for bird houses as it’s natural, breathable, and safe for birds.
Cedar, pine, or cypress are excellent choices due to their durability and resistance to decay. Avoid using pressure-treated lumber, as it contains chemicals that could be harmful to birds.
If you’re feeling creative, gourds can make excellent natural bird houses, particularly for species like wrens. When using wood, leave the interior unfinished to provide a rough surface for birds to grip.
For the exterior, use a water-based latex paint in a light color to reflect heat and extend the life of the wood. Avoid dark colors as they can cause the interior to overheat.
Metal bird houses should be avoided as they can become too hot in direct sunlight. If you’re recycling materials to build a bird house, ensure they’re thoroughly cleaned and free from any harmful residues.
Plastic materials should be avoided as they don’t breathe well and can trap heat and moisture.
Customizing for Target Species: Tailoring Your Bird House to Attract Specific Birds
To attract specific bird species to your bird house, it’s important to customize it to their preferences. The most critical factor is the size of the entrance hole.
For example, chickadees prefer a 1 1/8 inch hole, while bluebirds need a slightly larger 1 1/2 inch opening. The interior dimensions are also important.
Wrens are content with a small 4x4x6 inch box, while wood ducks need a much larger 12x12x24 inch space. Research the specific requirements of the birds native to your area.
Consider the height at which the house is mounted as well. Purple martins prefer houses 15-20 feet high, while robins are happy with nests just 5-10 feet off the ground.
Some species, like woodpeckers, prefer houses filled with wood chips to excavate. Others, like barn owls, need a much larger structure with an open front.
The color and design of the house can also play a role. Many birds prefer earth tones that blend with the environment, while purple martins are attracted to white houses.
Providing Nesting Materials: Helping Birds Build Their Homes
While birds are expert nest builders, providing some nesting materials can make your bird house even more attractive. Different bird species prefer different materials, so offering a variety can help attract a diverse range of nesters.
Small twigs, dry grass, and pine needles are popular choices for many species. You can gather these materials from your yard or purchase them from a garden center.
Avoid using dryer lint, as it can hold moisture and harm nestlings. Instead, offer natural fibers like pet fur, horse hair, or small pieces of wool.
Some birds, like chickadees, love moss and lichen for their nests. You can collect these from fallen branches or rocks in wooded areas.
Provide these materials by placing them in a suet cage or mesh bag near the bird house, or scatter them on the ground nearby. Be sure to put out fresh materials regularly, especially after rain.
For cavity-nesting birds like woodpeckers, provide some wood chips in the bottom of the house. This mimics the natural wood debris found in tree cavities.
Remember, while it’s helpful to provide these materials, birds will still gather much of their nesting material on their own.
Regular Monitoring: Keeping an Eye on Your Feathered Tenants
Once your bird house is occupied, regular monitoring is crucial to ensure the safety and success of the nesting birds. However, it’s important to do this without disturbing the birds. Start by observing from a distance using binoculars.
Watch for signs of activity like birds carrying nesting material or food to the house.
If you notice any problems, such as predators attempting to access the nest or the parents seeming distressed, you may need to intervene.
For houses with opening sides or tops, you can perform quick nest checks once a week. Do this swiftly and quietly to minimize stress on the birds.
Avoid checking in the early morning when eggs are being laid, or in the late afternoon when the young are settling down for the night.
If you find unhatched eggs after the expected incubation period, or dead nestlings, remove them promptly to prevent disease. After the young have fledged, clean out the old nest to prepare for potential second broods.
Keep a log of your observations, noting when nests are built, eggs laid, and young fledged.
This information can be valuable for your own records and for citizen science projects tracking bird populations.
Seasonal Maintenance: Year-Round Care for Your Bird House
Maintaining your bird house is a year-round responsibility that ensures it remains a safe and attractive nesting site season after season. In late summer or early fall, after the nesting season has ended, perform a thorough cleaning.
Remove old nests, scrub the interior with a mild bleach solution, and allow it to dry completely. This prevents the spread of parasites or diseases to next year’s occupants.
Inspect for any damage that may have occurred during the nesting season and make necessary repairs.
Before winter, ensure all drainage holes are clear to prevent water from freezing inside the box. Some birds, like chickadees, may use bird houses as winter roosts, so consider leaving some houses up year-round.
In these cases, add some dry grass or wood shavings for extra insulation. As spring approaches, check the bird house again for any winter damage. Tighten any loose screws or nails, and ensure the house is still securely mounted.
If you’ve taken the house down for the winter, rehang it by late winter or early spring to attract early nesters.
Throughout the year, keep the area around the bird house free from predator-attracting food sources and ensure nearby feeders are kept clean to prevent the spread of diseases.
FAQs:
What is the best time to clean out old bird houses?
The best time to clean out old bird houses is in late fall or early winter, after the nesting season has ended and before birds start looking for new nesting sites. This gives the house time to air out and lose any human scents before the next breeding season.
How often should I check on nesting birds?
It’s best to limit checks to once a week during the nesting season. Observe from a distance using binoculars most of the time. When you do need to check the nest, do it quickly and quietly to minimize disturbance to the birds.
Can I use soap to clean my bird house?
It’s best to avoid using soap when cleaning bird houses. Instead, use a solution of one part bleach to nine parts water. This effectively sanitizes the house without leaving residues that could be harmful to birds.
What should I do if I find an abandoned nest with eggs?
If you find an abandoned nest with eggs, it’s best to leave it alone for at least a week. Sometimes, birds may temporarily abandon a nest due to disturbances. If after a week there’s still no activity, you can remove the eggs and clean the house.
How can I prevent squirrels from enlarging the entrance hole?
To prevent squirrels from enlarging the entrance hole, you can install a metal plate around the hole. This reinforces the entrance and prevents squirrels and other animals from chewing and enlarging it.
Is it okay to paint my bird house?
Yes, you can paint your bird house, but stick to light, natural colors like tan, gray, or dull green. These colors help reflect heat and blend with the environment. Avoid dark colors as they can cause the interior to overheat.
How high should I mount my bird house?
The ideal height for mounting a bird house varies depending on the species you’re trying to attract. Generally, most small songbirds prefer houses 5-10 feet off the ground, while some species like purple martins prefer heights of 15-20 feet.

Hello, I’m Amelia White, the founder of birdsfanatic.com. As a lifelong bird enthusiast and spiritual seeker, I’ve always been fascinated by the mystical connections between birds and the human experience. On this site, I share my knowledge and insights into the symbolic meanings and spiritual significance of various bird species, exploring their roles in mythology, folklore, and cultural traditions. Join me on this journey into the world of birds, where we’ll discover the hidden wisdom and guidance that these magnificent creatures have to offer.
